- Help Center
- iK Shaker Solo
- Wi-Fi and Mobile Setup
-
iKhokha General Information
-
The iKhokha App
-
iK App
-
Sell on card machines
-
iK Prepaid
-
iK Flyer
-
iK Flyer Lite
-
iK Tap on Phone
-
iK Mover
-
The Shaker Duo
-
iK Shaker Solo
-
Cash Advance
-
iK Payment Gateway
-
iK Pay Link
-
iK Buy Button
-
Poster Point of Sale
-
iK Invoice
-
Catalogue Management
-
iK Webstore
-
Order Management
-
iK Debit Card
-
iK Business Cover
How to Check Your Shaker Solo's WIFI Connection
Unsure which WIFI network your Shaker Solo is connected to? Follow these simple steps to find out.
If you're not sure which Wi-Fi network your Shaker Solo is connected to, don't worry! You can easily check by following the steps below.
Before we get started, make sure that your Shaker Solo's Network Mode is set to Wi-Fi. If you need help with this, check out this Wi-fi Setup Guide.
Once your device is set to connect to WIFI, follow these steps to identify your WIFI network.
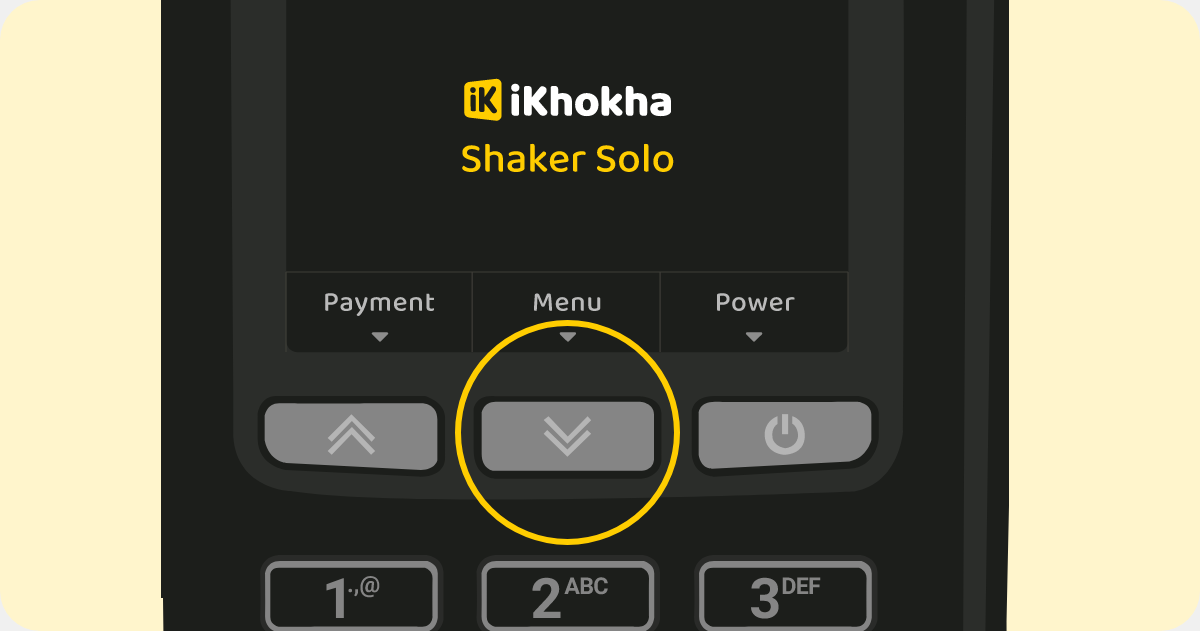
Step 1: Press the 'Menu 'button on your Shaker Solo home screen.
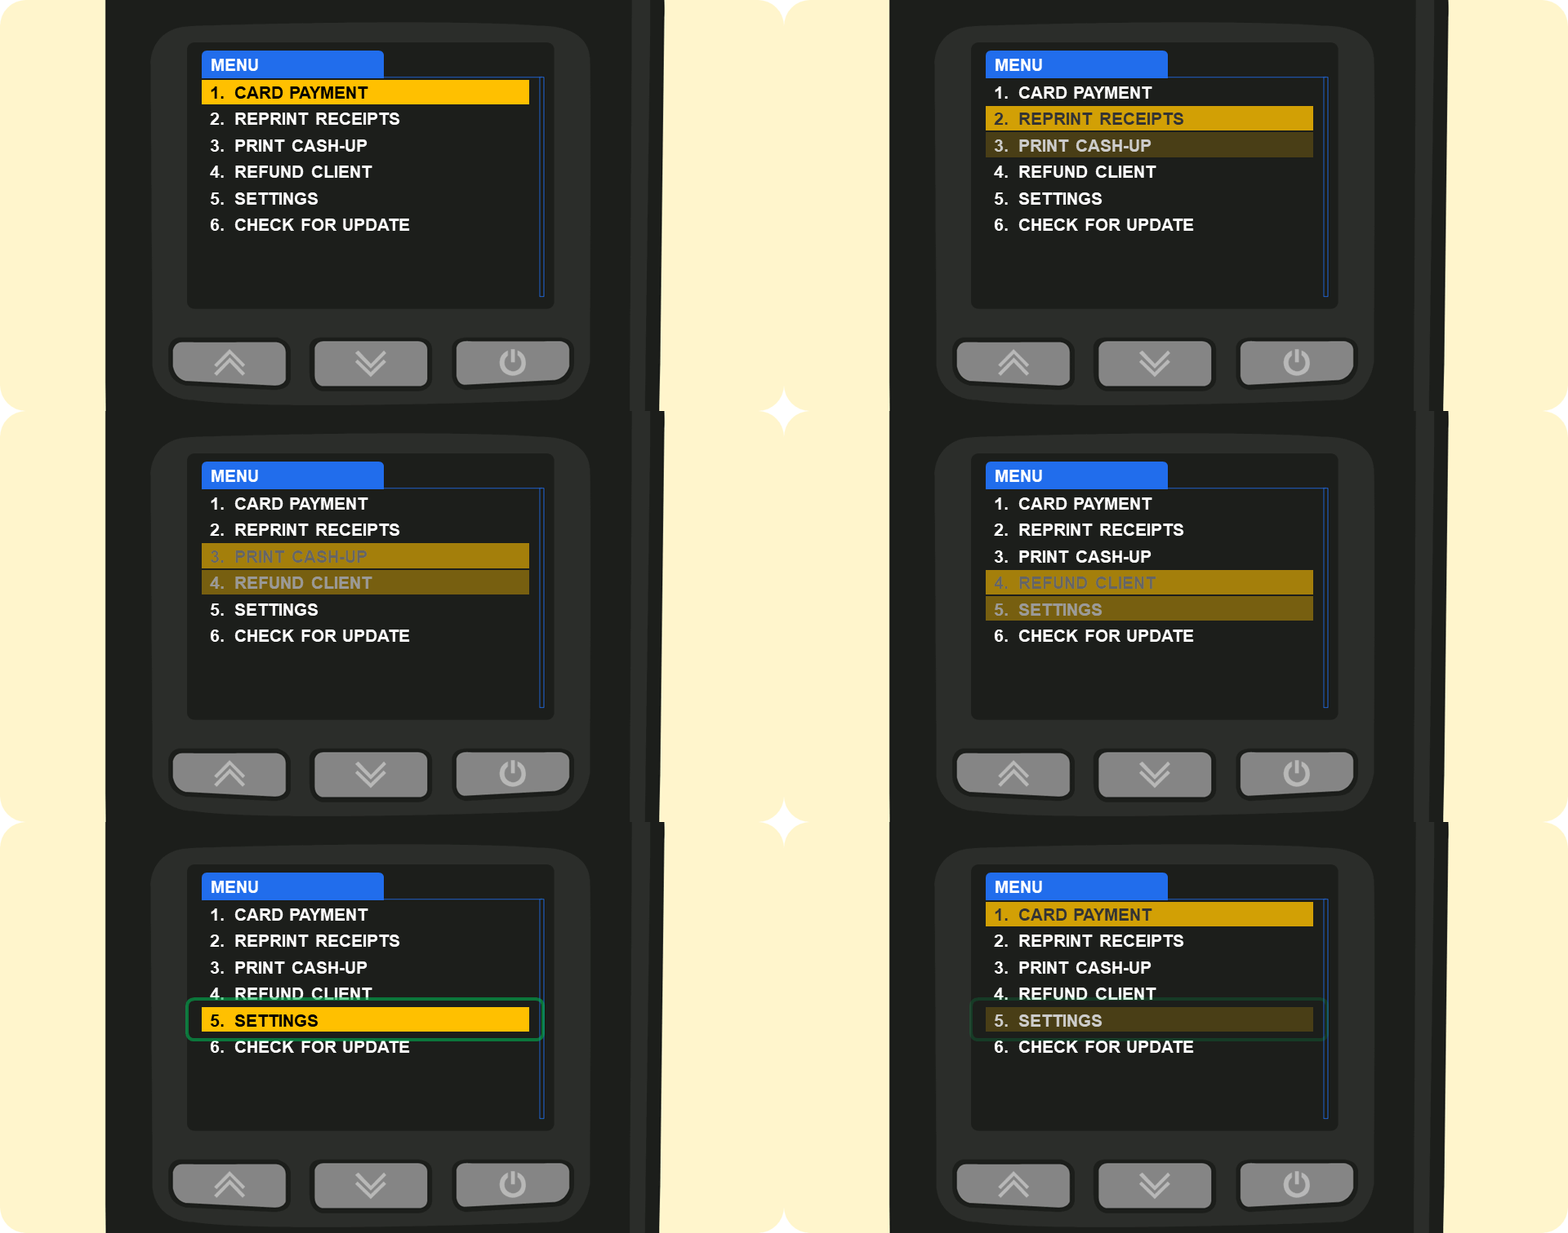
Step 2: Use the arrow keys to scroll down to the "Settings" option and press the green "Enter" button to select it.
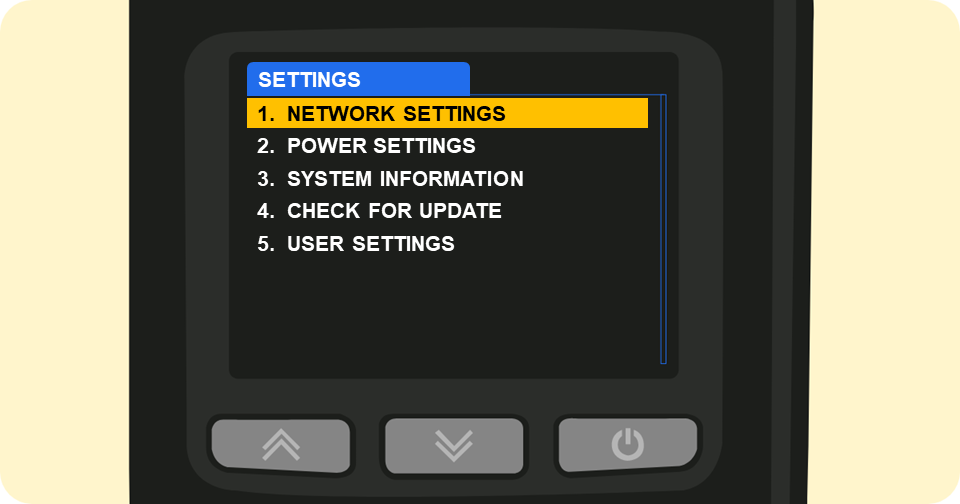
Step 3: Enter the 'Network Settings' menu by pressing the green 'Enter' button.
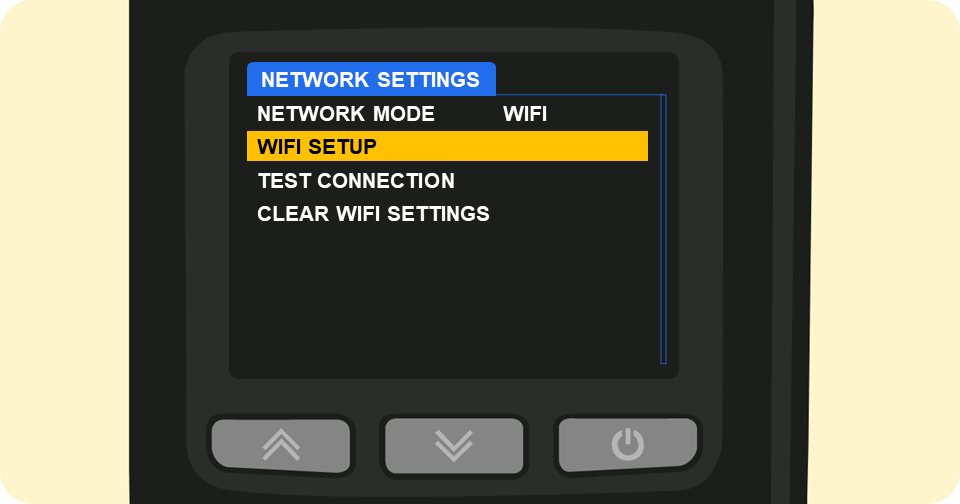
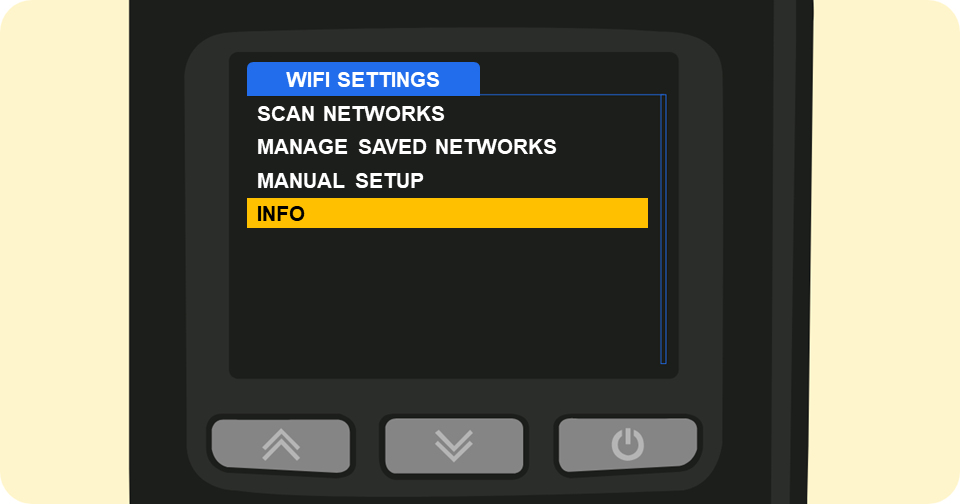
Step 4: Use the arrow keys to scroll down to the 'WiFi Setup' and press the green 'Enter' button to select it.
Step 5: Use the arrow keys to scroll down to 'Info' and press the green 'Enter' button to select it.
The current SSID (WIFI network name) to which your Shaker Solo is connected will then be displayed.
If you need assistance with this functionality, please contact iKhokha at support@ikhokha.com or call 087 222 7000. We're always ready to help you with any questions or issues you may have.
